
Replacing the motherboard fan on Bambu Lab A1 mini to reduce noise
Not that it was necessary, but when you have a disassembled A1 mini 3D printer on your desk with a noisy motherboard fan, and a spare 40x40x10 fan at hand, it's hard to stop. Worth noting that the stock fan is 25x25x10, so the faint of heart should look away.
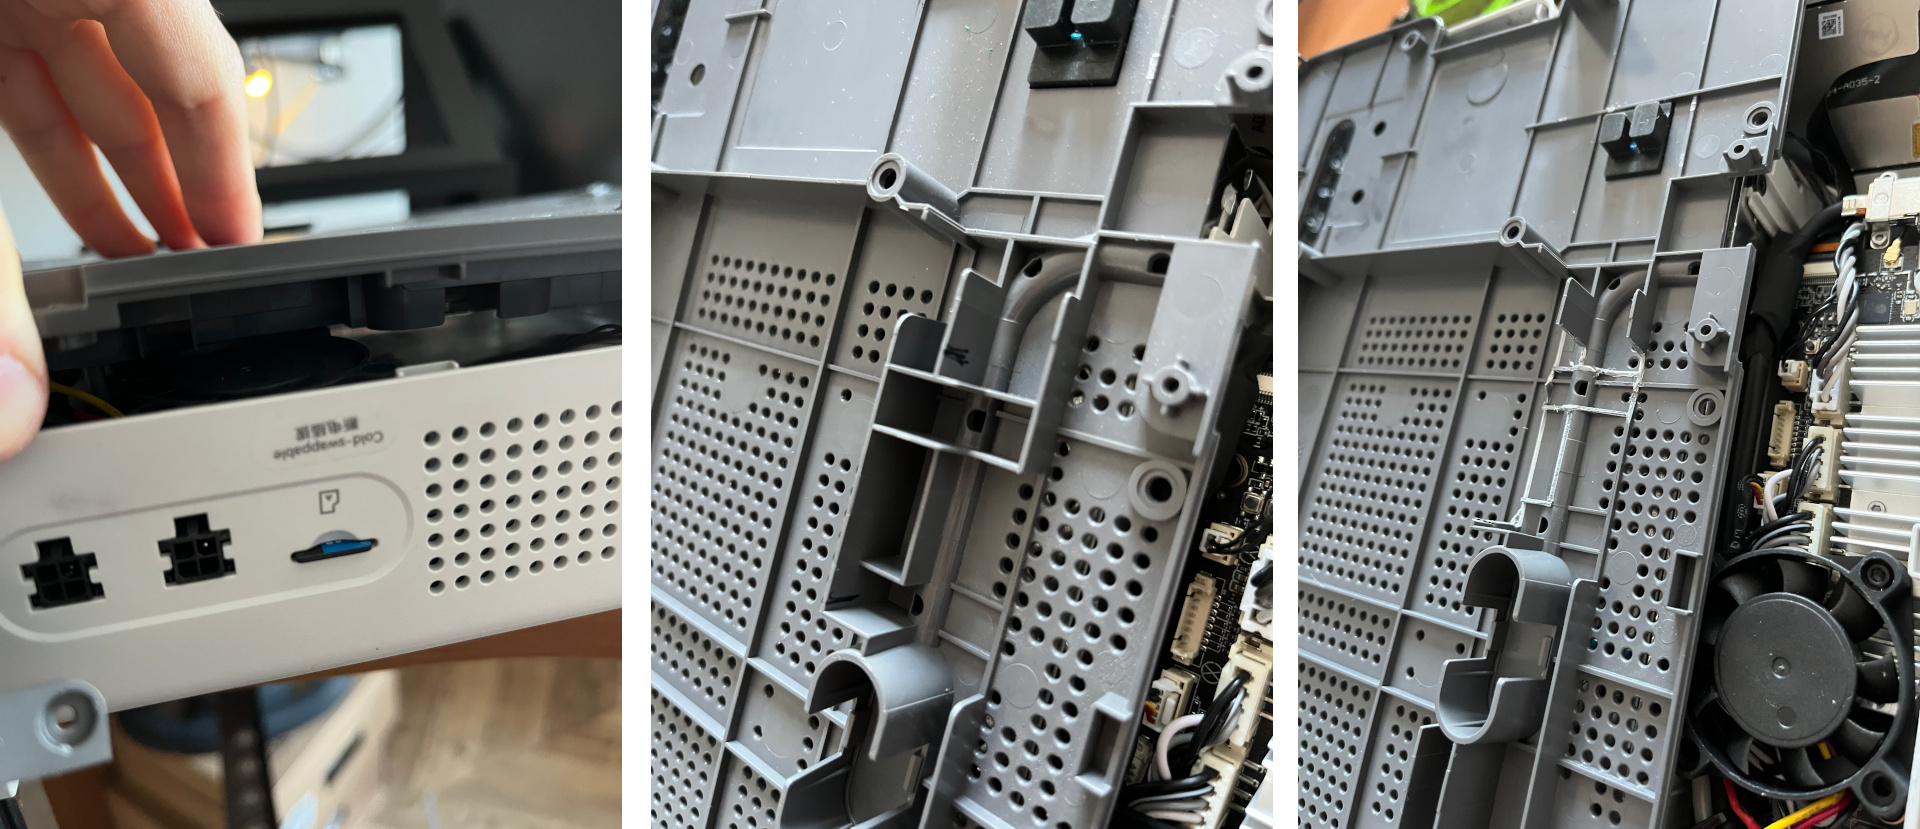
There's almost enough space for a 40x40 fan, but the screw tab on the case gets in the way. I carefully cut it off with side cutters, as seen in the photo.
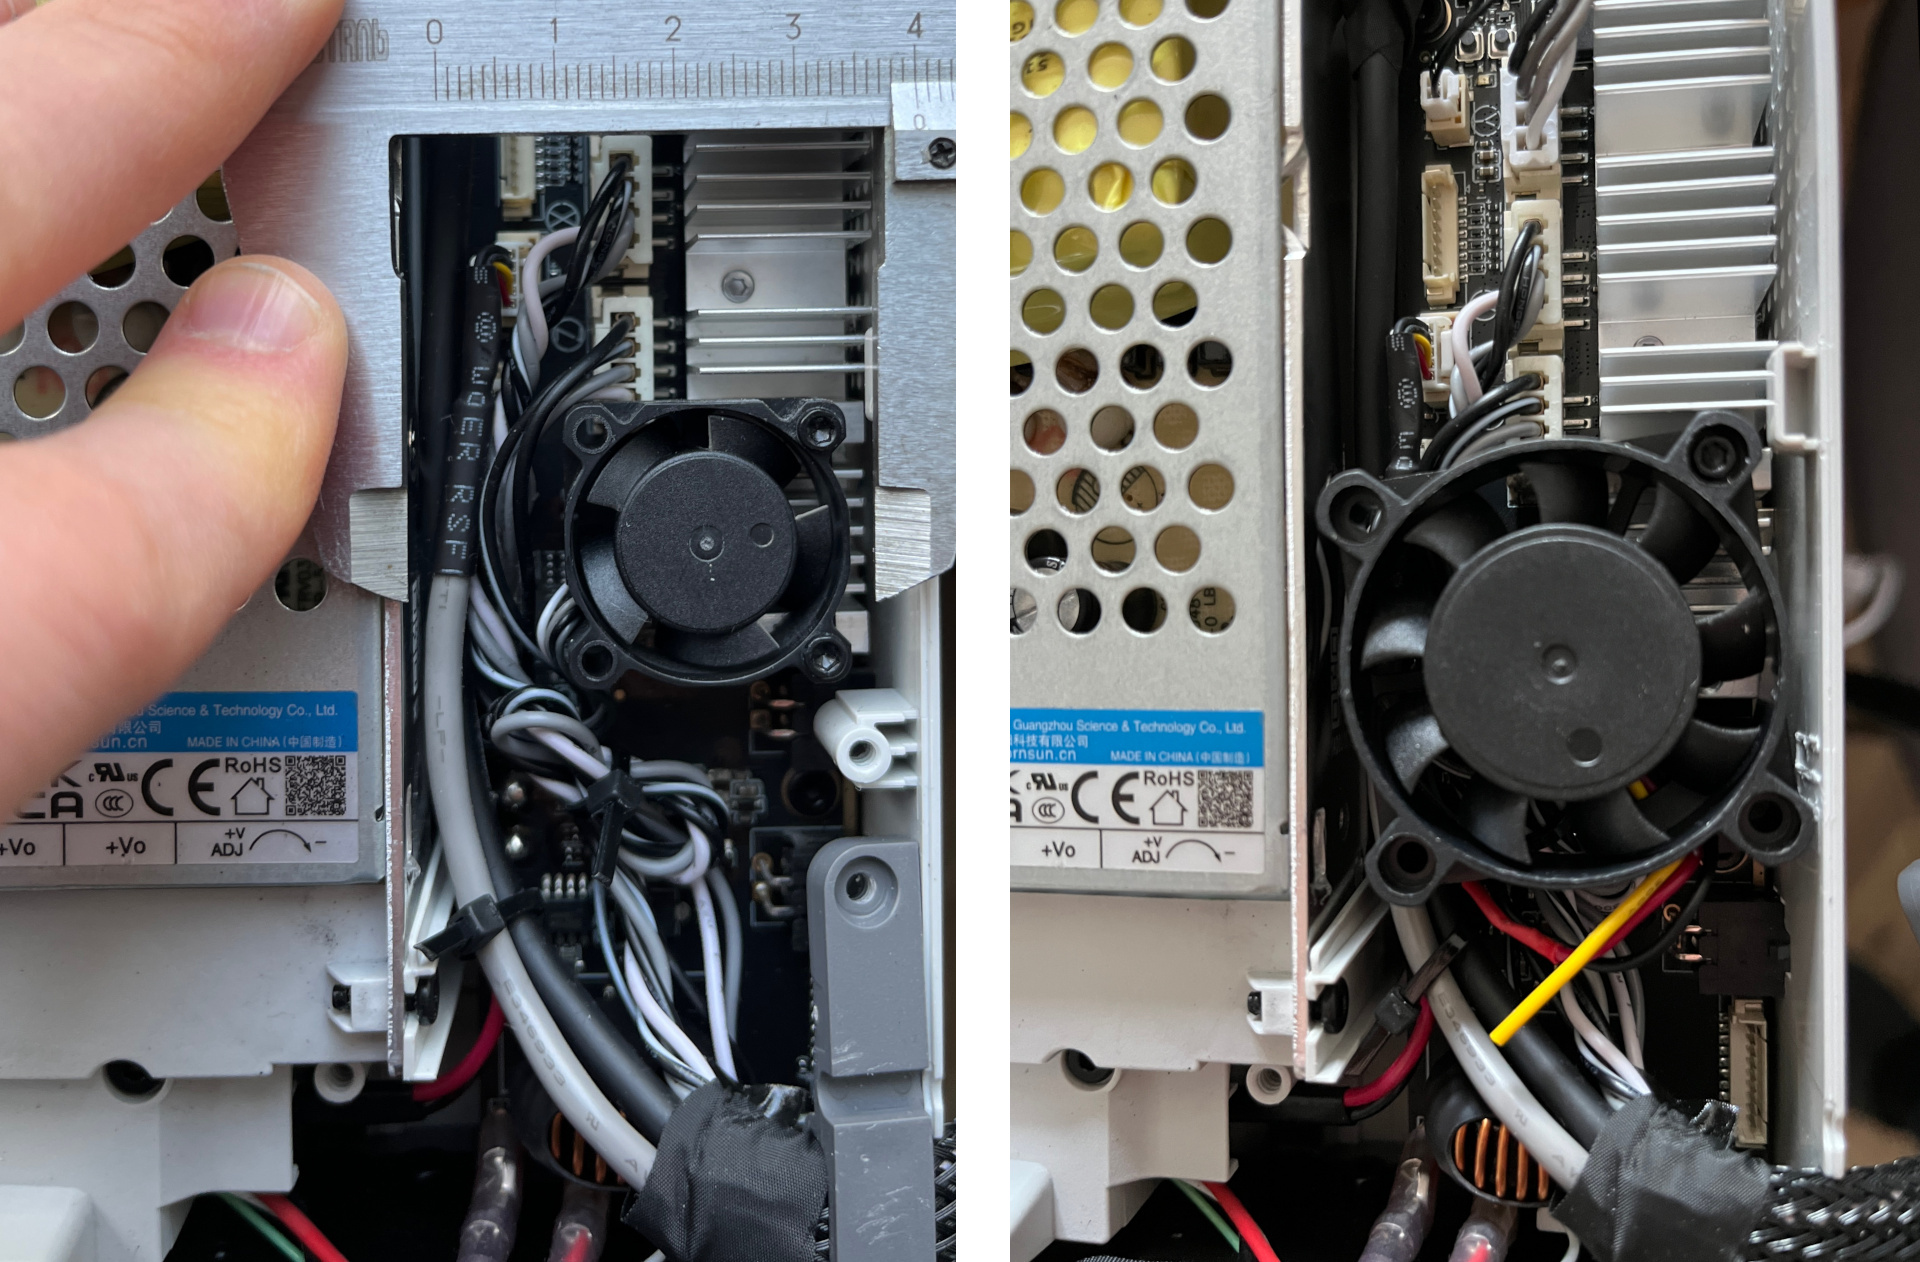
The stock fan initially seemed like a three-pin to me, but it's actually four-pin: the colors black, dark gray, light gray, and white blend together. I measured the voltage between the black wire and the dark gray one next to it: dark gray is ground, black is +5V. So much for color coding standards. Although +5V is very convenient here: a 40x40 fan will run quieter on this power, and its performance margin is already higher than the 25x25 anyway.
The 40x40 fan mounts with the stock screw, which is nice. After connecting the two power wires, the printer started up and showed no errors. Simple replacement.
Next, I was going to close the cover (more precisely - the tray), but there was a catch: additional stiffening ribs sit right where the new fan goes. A bit of side cutter work - and everything closed without gaps.
The noise is now almost unnoticeable. No surprise on 5V. Let's see how it performs.
Comments